Tutorial: Hiunday MP3 Speaker Repair: Charging Led Turns On But Does Not Turn On (Esp-Eng)
Saludos amigos de la comunidad Hive Diy.
En esta oportunidad vengo a mostrarles un nuevo tutorial, esta vez sobre la recepción de un parlante MP3 amplificado de ma marca Hyundai.
Este parlante vino con la falla de que encendía el led indicador de carga pero aún así el parlante no encendía.
Greetings friends of the Hive Diy community.
This time I come to show you a new tutorial, this time about the reception of a Hyundai amplified MP3 speaker.
This speaker came with the fault that the charging indicator led was on but still the speaker did not turn on.
Cuando vamos a revisar un equipo electrónico, siempre debemos verificar su estado. La prueba de encendido es muy importante, este será l prueba que nos indicará donde debemos buscar la falla, el área donde nos enfocaremos.
When we are going to check an electronic equipment, we must always verify its condition. The ignition test is very important, this will be the test that will indicate us where we should look for the fault, the area where we will focus.

Al observar que el circuito recibe carga y emite luz, quiere decir que no hay cortocircuito y esto es un buen indicio.
Al destapar y sacar el circuito nos debemos ir a la entrada de voltaje, a simple vista podemos observar todo en buen estado.
When observing that the circuit receives load and emits light, it means that there is no short circuit and this is a good indication.
When uncovering and removing the circuit we must go to the voltage input, with the naked eye we can observe everything in good condition.
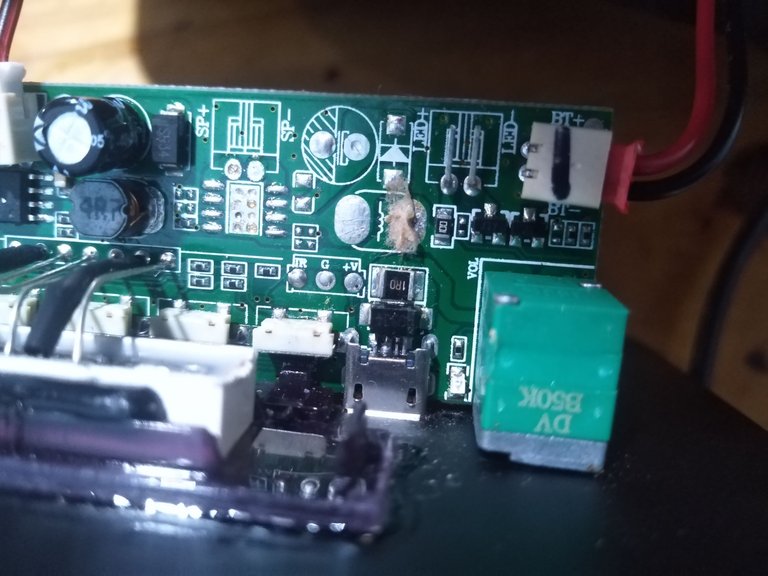
No se veía ninguna deformidad o chispazos característicos en los daños de tarjetas electrónicas.
Cuando nuestros ojos no pueden ver con claridad, el multimetro puede ser nuestra herramienta más adecuada para detectar fallas invisibles, además de conocer los componentes por supuesto.
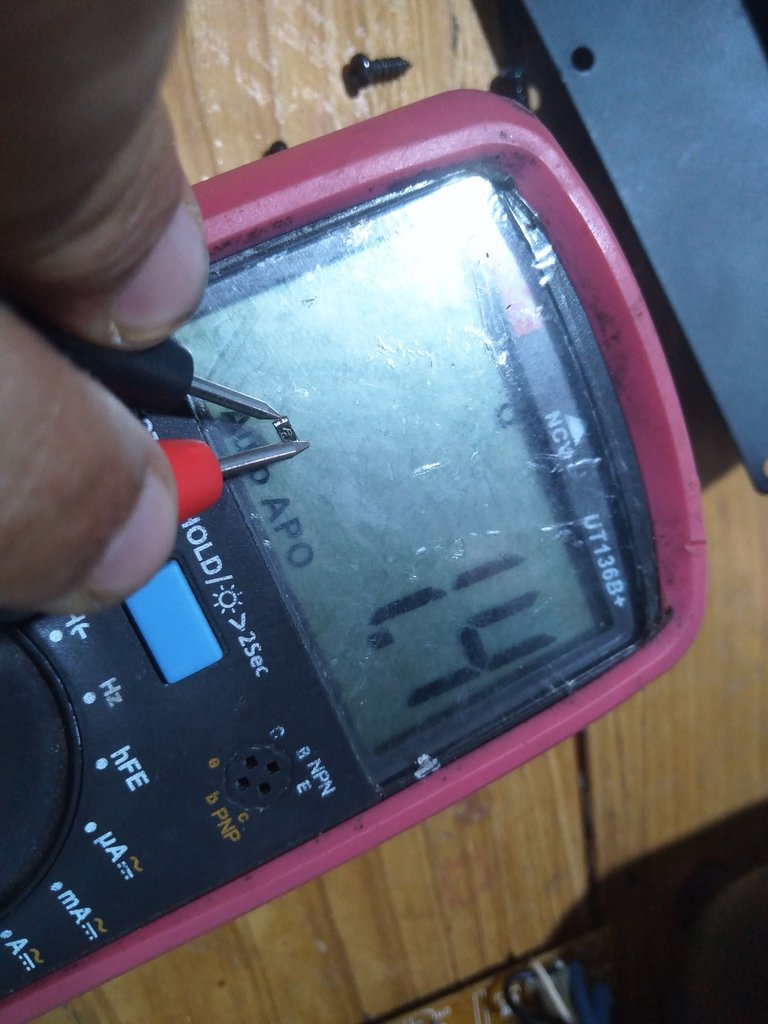
La parte que más sufre en un circuito es la de entrada de corriente, así que debemos buscar fusibles y descartar.
Al colocar el multimetro en continuidad o observé que honse emitía sonido, es decir; había una ruptura del fusible.
No deformities or characteristic sparks were visible in the damage of electronic boards.
When our eyes cannot see clearly, the multimeter can be our most suitable tool to detect invisible faults, besides knowing the components of course.
The part that suffers the most in a circuit is the current input, so we must look for fuses and discard them.
When placing the multimeter in continuity or I observed that honse emitted sound, that is to say; there was a rupture of the fuse.
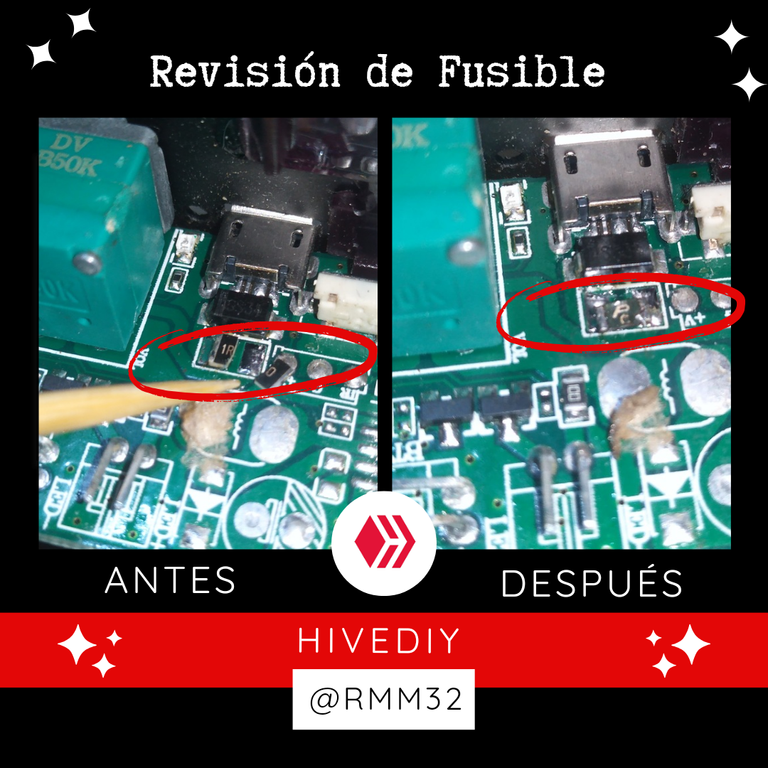
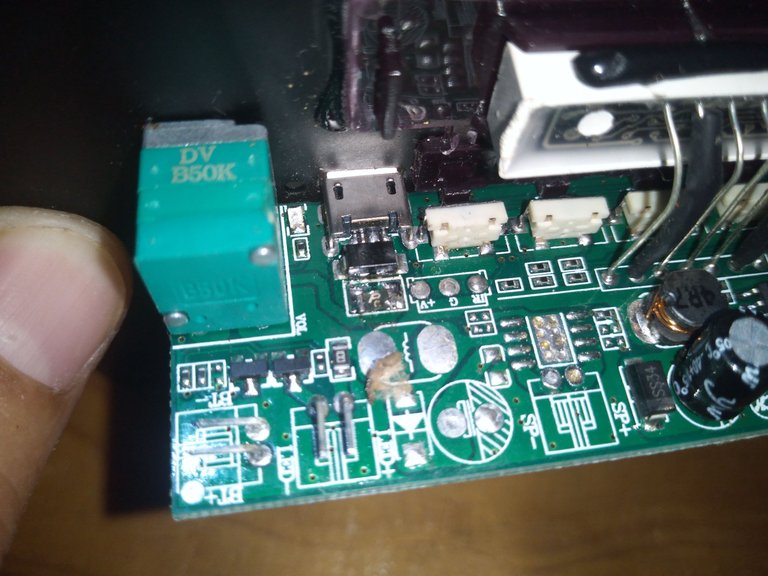
Al empezar a desoldar el fusible smd se dividió en dos pedazos,ahora encontramos el orígen de la falla, para descartar un corto en el área de ampliación dice otras pruebas con el multimetro, pero todo estaba bien, así que ubiqué un fusible smd en una placa de laptop.
En la imágen siguiente podemos ver el fusible, este tipo de fusibles se puede identificar fácilmente porque tienen una letra, a veces una P, T, B y en la placa la letra F
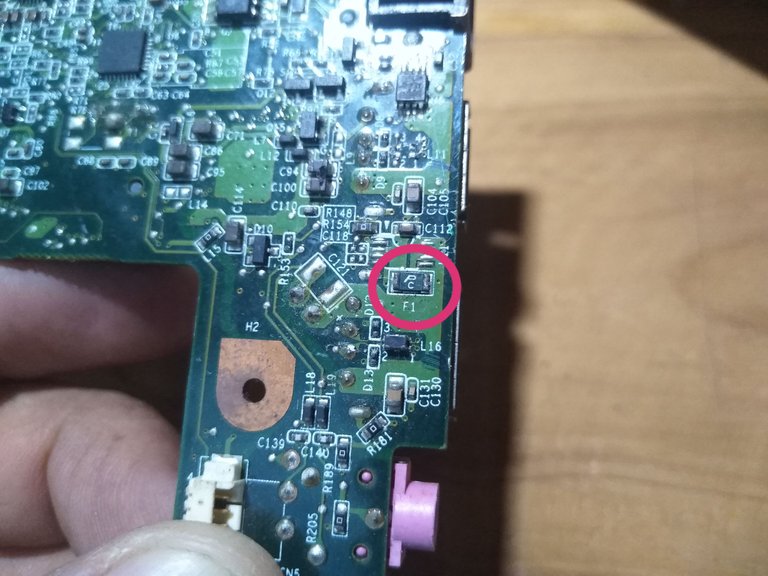
El fusible original tenía la nomenclatura 1R0, esto significa que es una resistencia baja, de 1 Ohms. Al medir el fusible de reemplazo podemos ver la medida de 1.4 Ohms, o sea igual es un fusible pero de un poco más ohms.
Ahora lo podemos soldar en la placa y volvemos a probar si no hay cortocircuito de algún componente como diodos.
When I started to desolder the smd fuse it split into two pieces, now we found the origin of the failure, to rule out a short in the extension area it said other tests with the multimeter, but everything was fine, so I located a smd fuse in a laptop board.
In the following image we can see the fuse, this type of fuse can be easily identified because they have a letter, sometimes a P, T, B and on the board the letter F.
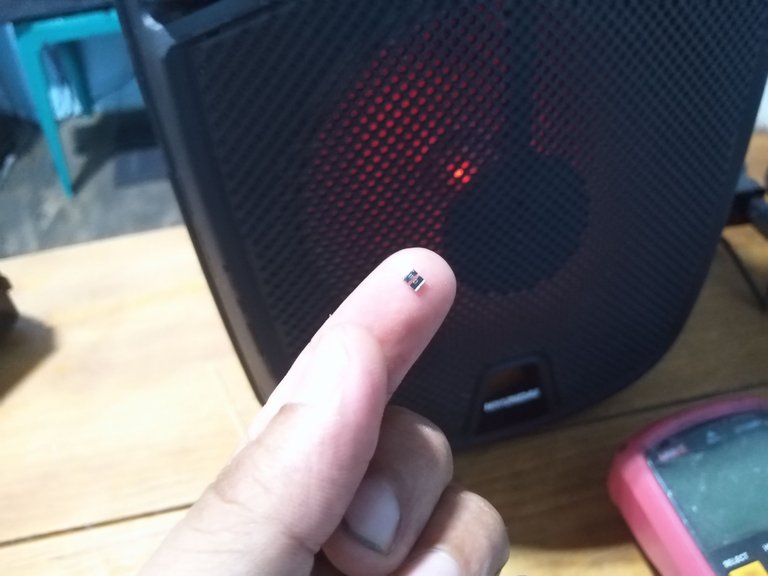
Podemos apoyarnos con una pinza para colocar en su lugar el fusible, ya que es muy pequeño y delgado.
Luego le colocamos estaño por ambos extremos y corroboramos que esté bien soldado en la placa.
We can use a pair of tweezers to place the fuse in its place, since it is very small and thin.
Then we put tin on both ends and check that it is well soldered on the board.
Ahora solo toca hacer la prueba de encendido para saber si le hemos dado solución a este parlante dañado.
Al colocar la carga y darle a encender, el parlante encendió y emitió el sonido característico, la mujer con voz robótica indicando que el parlante está listo para usarse y que el Bluetooth está activo.
Now we just have to do the power-on test to know if we have solved this damaged speaker.
When we placed the charge and turned it on, the speaker turned on and emitted the characteristic sound, the woman with a robotic voice indicating that the speaker is ready to use and that the Bluetooth is active.
Como pudieron darse cuenta, a veces los componentes más pequeños pueden ocasionar grandes problemas y paralizar todo un sistema.
Ahora ustedes tienen el conocimiento de cómo detectar un problema de este tipo y como solucionarlo.
Espero que este tutorial les sea de mucha utilidad en el futuro.
As you may have noticed, sometimes the smallest components can cause big problems and paralyze an entire system.
Now you have the knowledge of how to detect such a problem and how to fix it.
I hope this tutorial will be very useful to you in the future.
Todas las fotografías fueron tomadas con mí Smartphone Huawei Dub-Al00.
Traducido con Deepl

Buen trabajo de reparación, muchas gracias por compartir este paso a paso de utilidad para muchos.
!discovery 35
Gracias, me siento a gusto compartiendo mis tutoriales en esta comunidad tan agradable.

This post was shared and voted inside the discord by the curators team of discovery-it
Join our Community and follow our Curation Trail
Discovery-it is also a Witness, vote for us here
Delegate to us for passive income. Check our 80% fee-back Program
Congratulations @rmm32! You have completed the following achievement on the Hive blockchain And have been rewarded with New badge(s)
Your next target is to reach 150 posts.
You can view your badges on your board and compare yourself to others in the Ranking
If you no longer want to receive notifications, reply to this comment with the word
STOPCheck out our last posts:
¡Felicidades! Esta publicación obtuvo upvote y fue compartido por @la-colmena, un proyecto de Curación Manual para la comunidad hispana de Hive que cuenta con el respaldo de @curie.
Si te gusta el trabajo que hacemos, te invitamos a darle tu voto a este comentario y a votar como testigo por La Colmena.
Si quieres saber más sobre nuestro proyecto, te invitamos a acompañarnos en nuestro servidor de Discord.
https://twitter.com/hivediy47901/status/1788035685825339777
Gracias por promocionar mi publicación en twitter. Espero seguir mejorando.